This walkthrough explains the complete procedure for reading and writing data on a Volvo MPS6 GEN3 Transmission Control Module (TCM) using the OBDSTAR DC706 ECU programming tool. The process covers bench connections, software navigation, and both Flash and EEPROM read/write operations.

Required Equipment and Preparation
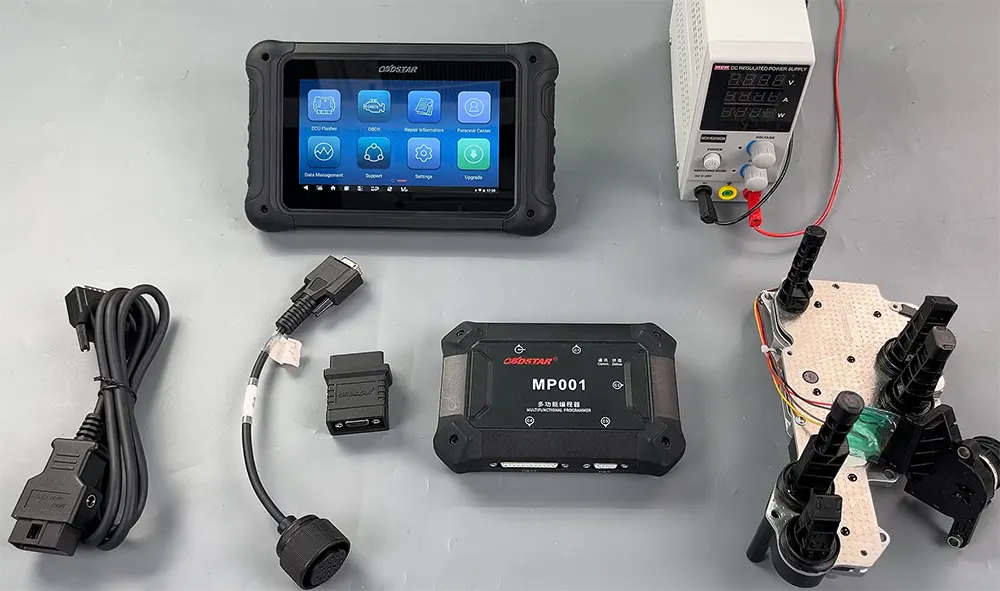
Before starting, gather the following items:
- OBDSTAR DC706 main unit
- Stable power supply for the DC706
- Main connection cable
- TCM‑008 dedicated wiring harness
- Signal converter (as needed)
- MP001 programmer module
- Target Volvo MPS6 GEN3 TCM
Important: Ensure that your DC706 device is updated to the most recent software version before beginning. This guarantees access to the latest vehicle definitions and bug fixes.
Step‑by‑Step Operation Guide
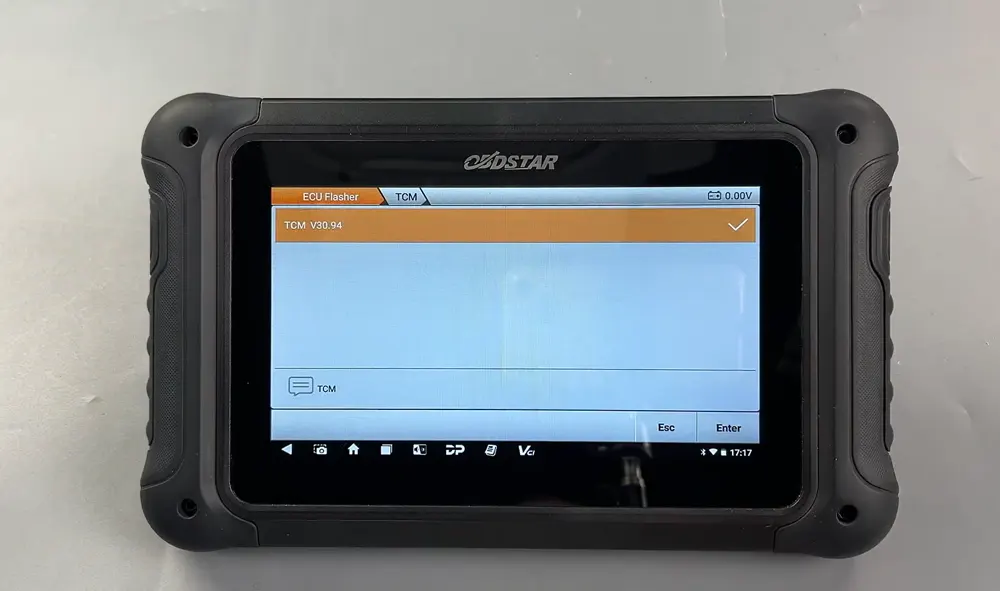
1. Access the ECU Flasher Module
On the DC706 home screen, navigate to ECU Flasher, then select TCM from the system list. Choose the correct software version that matches your target module.
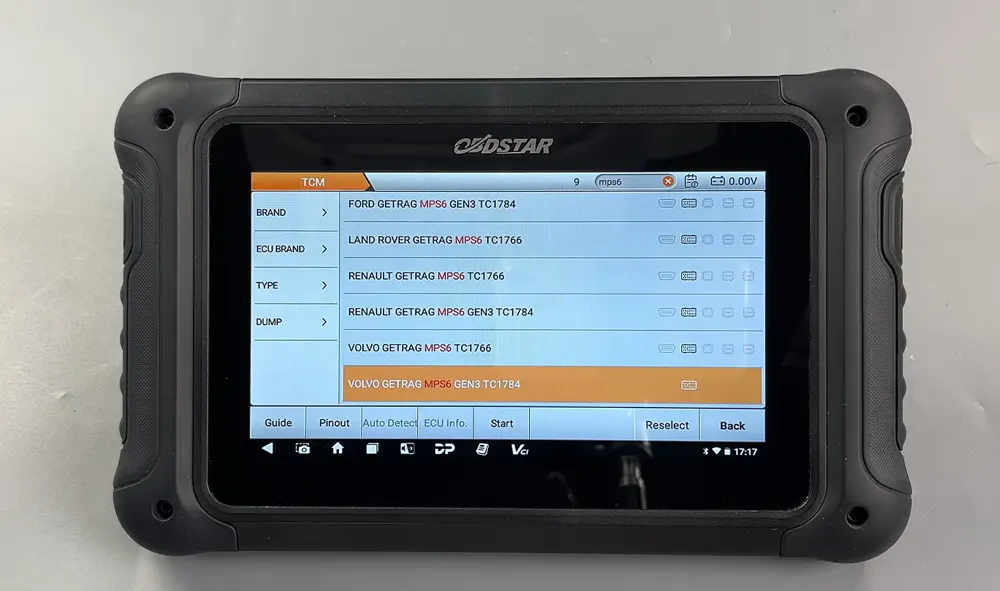
2. Locate the Correct ECU Model
Use the search icon in the top‑right corner of the screen to quickly find the specific ECU model. Once identified, select it from the results.
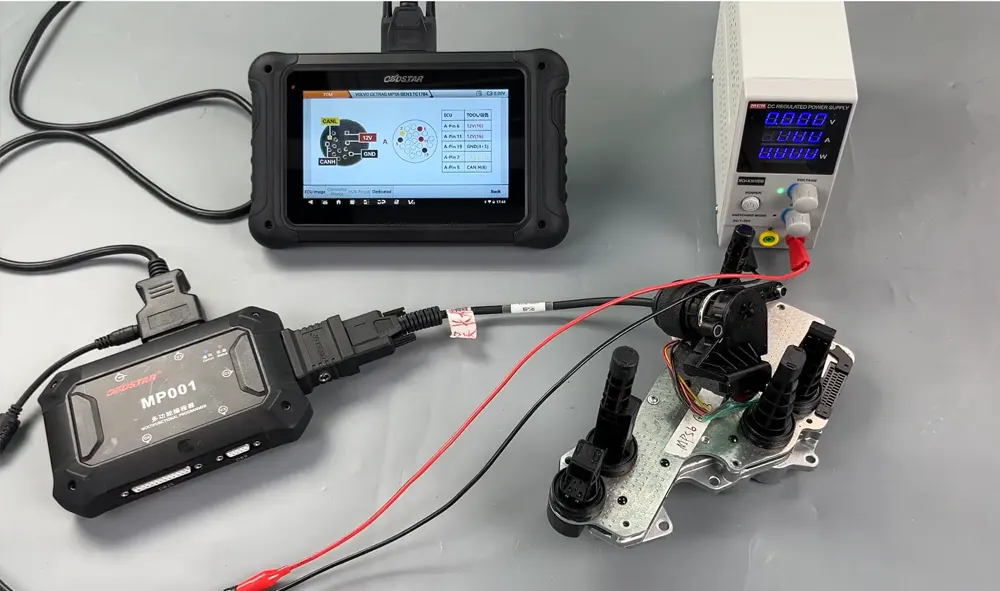
3. Review Connection Diagram and Setup
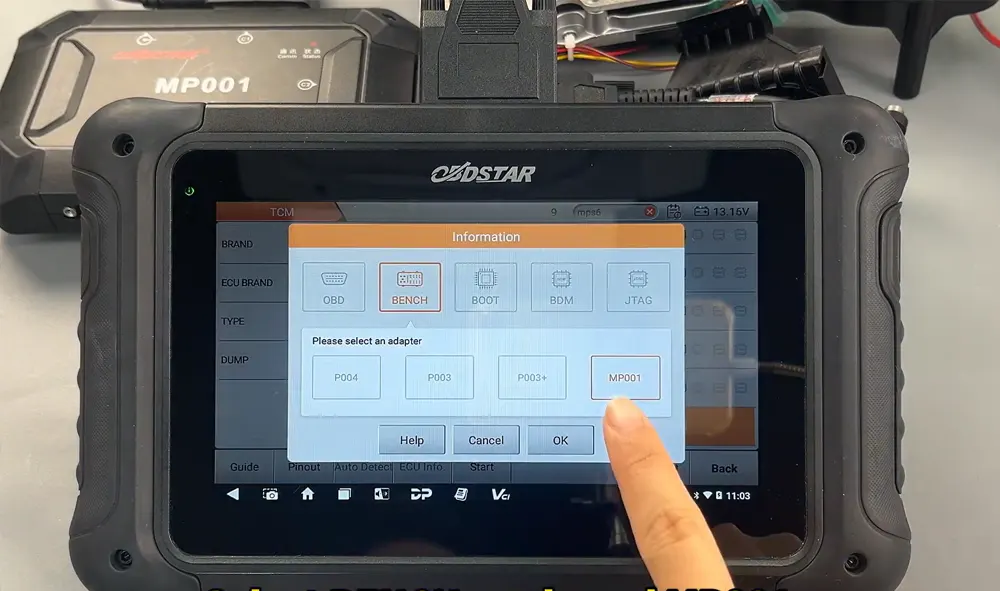
Tap on Guide and scroll down to view the wiring connection diagram. After familiarising yourself with the layout, go back and select Pinout. Choose Bench mode and specify MP001 as the programmer. Visually confirm that the physical module appearance matches the on‑screen reference.
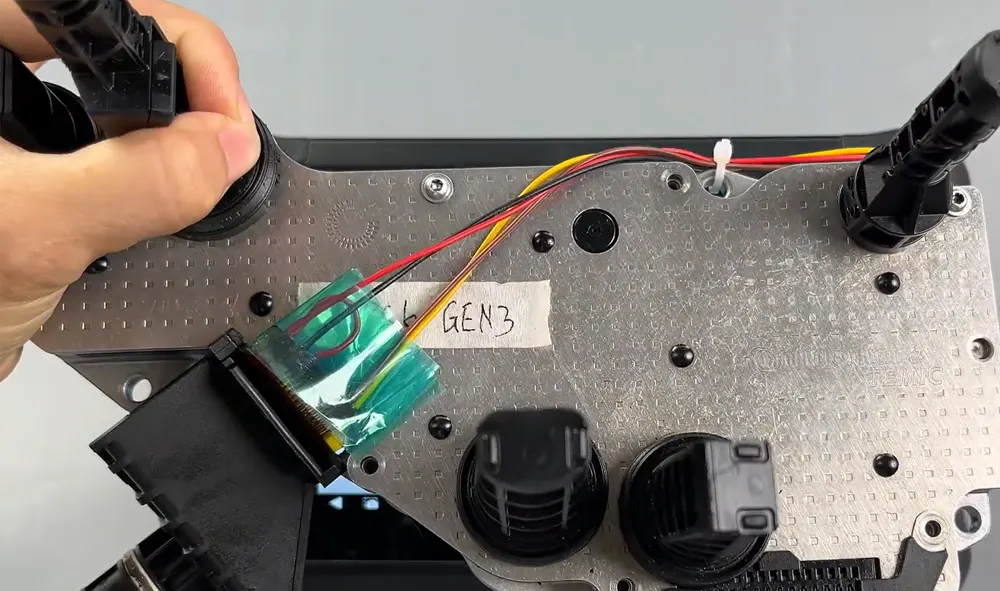
4. Cable Connection Verification
Tap Dedicated to check cable compatibility, then select Connector Pinout. Follow the illustrated diagram to connect each wire correctly between the DC706, MP001, and the TCM.
5. Establish Communication and Read Flash
Return to the main operation screen and tap Start. Confirm BENCH mode and MP001 are selected, then press Connect and confirm with Yes. Once the ECU is successfully connected, proceed to read the Flash memory data.
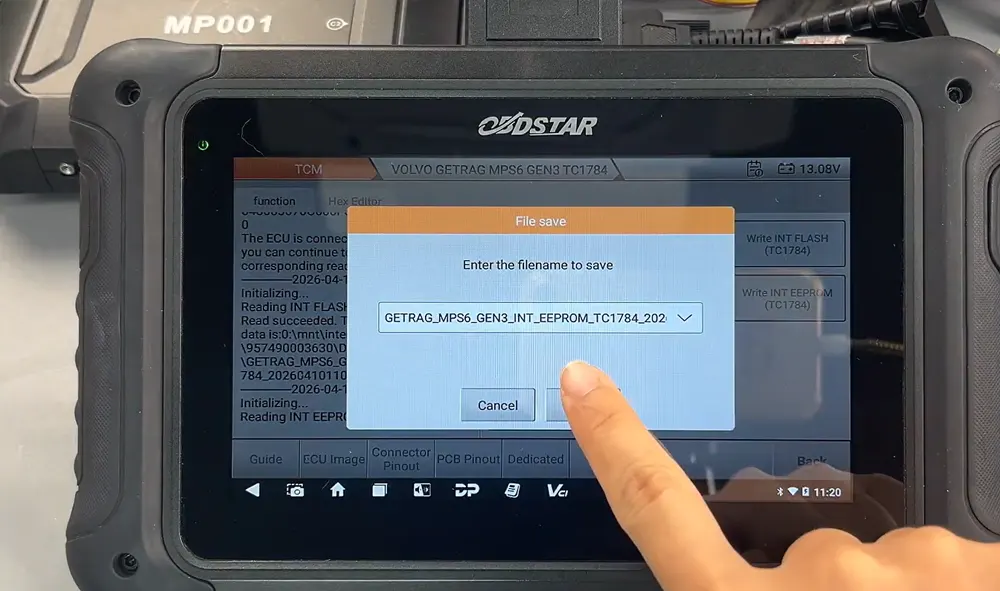
6. Save Flash and EEPROM Backups
When reading Flash data, you may rename the file as needed. The default save path is shown on the left side of the screen. After Flash reading is complete, repeat the process to read EEPROM data – tap OK and note the save location displayed.
7. Writing Flash Data Back to the Module
To write Flash data, select Load External Data. You can locate your backup file by its name, timestamp, file size, or by using the search box. Choose the correct backup file, tap OK, and then confirm by tapping Yes to initiate the write process.
8. Writing EEPROM Data and Completion
Similarly, for EEPROM writing, select Load External Data, pick the appropriate backup file, tap OK, and confirm with Yes. When the device displays “write successful”, the entire process is finished. The TCM is now programmed with the desired data.
Final Notes
This procedure is specifically validated for Volvo MPS6 GEN3 TCMs using the bench method with MP001. Always double‑check connections and file selections to avoid errors. Keeping your DC706 software updated ensures the best compatibility and smooth operation.
Recent Comment